So much color & pattern I think it could POP

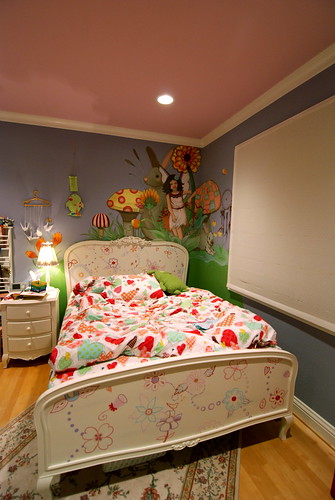
On Wednesday I snuck out of here (Ok, ok, I left Bird with her babysitter and then Jared took over after work. Like I could sneak anywhere these days, no way) and went to one of my very favorite client's house to paint her daughter's bed.

I painted the mural in her room maybe 3 years ago...it's still being enjoyed which made me tremendously happy. She and her brother are engaging, charming kids & I love chatting with them and having them hang out while I work. I kept having to remind that sweet girl to stop bouncing on the bed as she was talking though - the wiggly flower look wasn't what I was going for :o)

Happy songbirds and colorful blooms.

Star the cat kept me company most of the time, then Cocoa Puff would wander in and flick her fluffy tail over my (recycled baby food) jars of mixed colors. No cat hair in the mural this time though...

It was a fun cheery color palette to work with. I kept thinking this would make a great pattern for fabric.

This weekend we're headed to the SF Ocean Film Festival where Jared's sister is showing her film "Lost on a Reef". Can't wait!

Happy Friday to you!

xo,

Songbirds & Dotted Blooms: A painted bed

I'm headed out later on today to paint a little girl's bed with all sorts of loveliness...


We decided on the birds, flowers, and polka dots above. Below are some of the other sketches I put together in my design process (which was really long & drawn out this time for some reason). Forgive the graininess of the images - they're iphone shots of prints of my sketches so that's like 3x removed from the original.

I love this kind of mural work and can't wait to get over there!


And the mural in the background was painted by me too :o) Well before I had Bird and was able to spend 2 or 3 days straight in there without a care in the world except getting the colors right and filling this sweet girl's room with winged fairies, striped rabbits, spotted mushrooms and strawberries.

xo,

Lake Tahoe


We went to Lake Tahoe this weekend and had such a great time. There were a couple mishaps - lack of sleep for all of us & food poisoning for Jared - but our general feeling about the trip was a positive one. It's so nice to get away sometimes. Not having to board a plane or pack for a week's time was a bonus.

It was fun to see & play in SNOW! We sledded a lot (Miranda was the youngest sledder we saw - she was often happy just to sit on my lap and watch). Phylo got to run around a big snowy meadow and eat mouthfuls of fresh powder.

You can spy the cute little cabins where we stayed in the photo above.

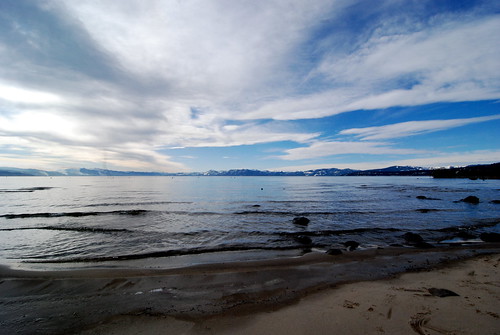
Lake Tahoe in the winter is such a play of opposites. Lapping waves on a sandy beach with patches of snow & ice interspersed between pine cones and crustaceans crushed into the shore. The array of blues and grays in the clouds and sky were incredible.

Here you can see that there's something on my lens, haha.

And you can also see the sad little bruises on Bird's face. The result of knocking heads with Phylo in a game of ball (that Phylo won).

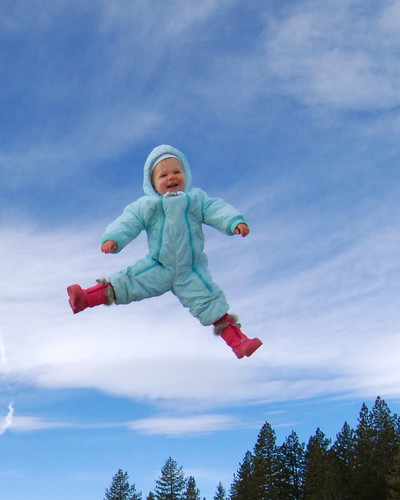
This is the uncropped version of the first photo in the post, which shows it was actually Jared throwing our Bird up in the air and that she can't actually fly - which I'm certain that you had assumed by now.

There are lots more Tahoe pics at my flickr.

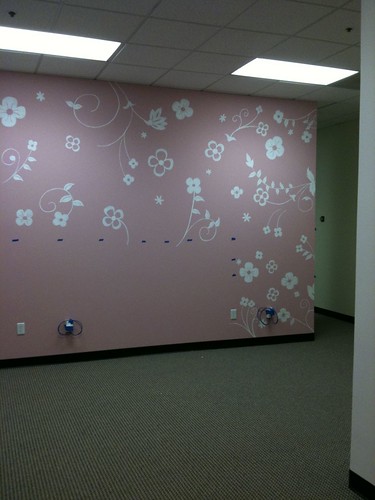
And to follow up from my last post...this is what I painted at Noodle & Boo last week. It's a 16' x 10' wall that will have cubicles in front it (where I didn't include flowers). I took the photo with my phone so it's a little dark & not so crisp, but you get the idea. I didn't leave the work site till 11pm...and didn't get to complete the other area of the office to be painted (I just wasn't up for working into the next day - I mean, really). I'm headed back this week to finish up.

Happy Martin Luther King day to you!

Painting & Installing Murals on Canvas, A Tutorial


I've now painted and installed quite a few murals on canvas, rather than just painting them directly on the wall. This method has some great attributes - the artist can work off-site, the client is only bothered for a day or even just for a few hours, and should the client (or you!) move and want to take the mural along it's a cinch to pull off the wall (with a little effort, but it'll come off I promise).

Materials you'll need:
-canvas to paint your mural on
-scissors or rotary cutter, mat, & ruler (for trimming mural)
-clay based wallpaper adhesive (available at many paint stores - this is the thick, opaque stuff)
-paint tray (I line mine with a spare plastic bag taped around the back, or you can use foil)
-paint roller and roller cover (I like ones that can hold a lot - look for "rough surface" variety)
-low tack tape (for holding mural in place - lightweight applications only)
-brayer
-staple gun (for tacking mural in place in heavyweight applications)
-razor blade or x-acto knife
-cloth rags & water (keep a damp rag tucked in your back pocket - so helpful for wiping off excess adhesive!)
-paintbrush for touch ups (along with paint to match)
-dropcloths


Here's how to do it:

Select a medium to heavy weight canvas. I prefer a pre-primed canvas as it saves the step of applying gesso.

Measure and trim your canvas to the size or shape you need. I think it's a good idea to leave some extra room on the sides - a place to dab your paintbrush, or add to once installed if your measurements were a little off.

Sketch out your mural scene:


Paint away!


Trim your piece (you can wait to do this if you're unsure of exact dimensions). If you're trimming straight lines like I was (104+ feet of straight lines), I recommend using a rotary cutter with a straight edge and self-healing mat. The work will go much faster.

Be careful! Those rotary cutters can really bite. I know this well :o(


When you're all set to install take a minute to get your work area prepped. Have all your tools on hand, drop cloths down, mural(s) placed in front of where they're to be put up. If you like, tape your mural in place to see what you have to work with (keeping in mind the size may change slightly after applying adhesive - see my story below).

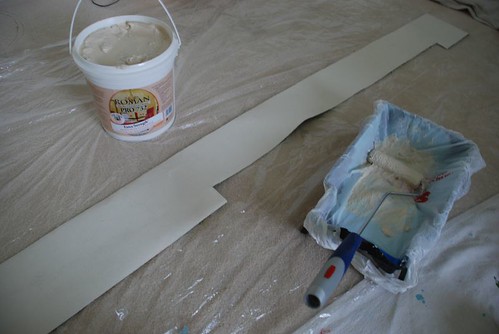
Pour the adhesive into a paint tray. Then using a roller (small or large depending on your mural size - I used a 4" roller for this one), apply a consistent and fairly thick layer of adhesive to the back of the canvas.

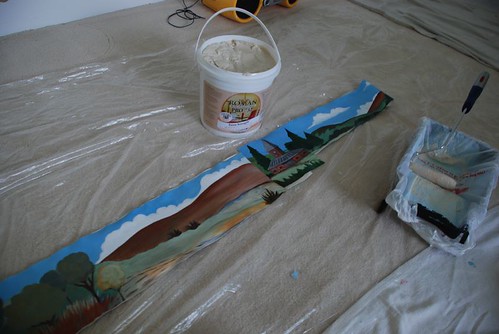
Fold the ends of the canvas in to meet in the middle. This is called "booking" and it allows the adhesive to set up.

While the adhesive is setting up on the canvas, quickly roll the area of the wall the mural is going on with the same adhesive (a nice even layer, not too thin).


You have a few minutes...but try not to take too long. You can always apply a little more adhesive as you're putting the canvas up but it's easier just to move along briskly.

Showtime! (It can be helpful to have a second pair of hands for this...I didn't for this mural but it went okay. Anything bigger and you'll find it gets unwieldy.) Pick up your canvas, unfold one end and press it in place starting from the top. Move your free hand along the canvas, pushing it against the wall and sliding it somewhat (it'll have some wiggle room) the direction you want it to go. Unfold the other half of the canvas and press it into place as well. If you're working with a very heavy canvas, or if your canvas is very large, it may need extra help in attaching. If that's the case, have your staple gun handy and drive a few staples in (at the top) to hold it in place. You can paint over these staples once you're all finished installing.

When the canvas is where you want it, pull out your brayer and begin to roll it along the surface moving from the center out to the sides. This will push out all the air bubbles. Sliding your hands along the canvas (center out) is very effective too.


The wonderful thing about the clay based wallpaper adhesive is that as it dries it pulls the canvas into the wall making it like one solid surface. It really is amazing.

When your mural is attached to the wall you can then assess your touch ups. Maybe you have a little gap here or there (if you were fitting it into a niche maybe) - simply fill with matching paint. Maybe you have some overhanging canvas - trim it neatly with a razor blade or very sharp mat knife (x-acto blade, etc.). Many of my clients have chosen to frame out the mural and have installed molding around the edges (overlapping the edges) - a beautiful finish. Or maybe (like in my case over the weekend) your canvas surprises you and shrinks once you apply the adhesive (!) and you come up short on all sides. What I ended up doing (instead of freaking out) was filling in my gaps with paint to match. I feel like there's always a way to rescue things - that's totally my motto!


That's it! You're done! You can always add more paint on top if you desire.


Have fun :o) Hope this is helpful to some of you out there! And of course, let me know if you have any questions.

xo, dh

A Vintage Train Scene

Since having Miranda everything takes me longer to do. Mural work is no exception of course! I lost track of how many stops and starts it took to complete this project, and how many palettes of paint dried up on me from so many interruptions. But it's done! I installed the mural over the weekend and now can share it with you (not the best of photos...it was getting dim, but hoping to get back over there and re-shoot some).

I painted the mural in my studio, pinning the canvas panels to my felt wall and slowly working through them.

Matching the end of one panel to the beginning of the next one. I worked on a primed heavy canvas that I meticulously measured out.

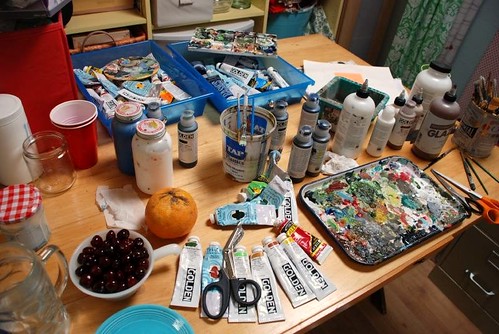
I used Golden paints for the most part - love that brand. Golden paints and lots of lots of palettes.

I installed the panels with not too much drama (the drama I'll go into in my next post which is a tutorial on installing murals on canvas).

Touch ups were minimal. It all tied together so nicely. Just a little dab of trim white here and a little swipe of sky blue there.

My clients love it and so does their 3 year old - it's his room! Now all they have to do is pop their awesome train on the track and let it do it's choo choo thing. So cool.

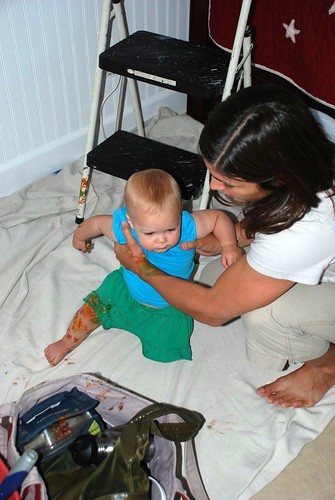
Jared and Miranda came to visit at the end of the long install day. Who'd have thought the messiest moment of the day came not from me with buckets of paints, wallpaper paste, and glazes, but from the Bird. Jared and I glanced over at her when things got just a bit too quiet. She had somehow gotten into my paint tray of not at all dried up (for once) acrylic paints and had it ALL over her - clothes, arms, legs, everywhere! I swooped in but didn't really know what to do, hahaha, and Jared just stood there and took pictures. I didn't find that to be a good idea at the time but in retrospect I'm glad he did :o)


Whew!

It's so good to be done with this project. I can't even tell you. Well, I guess I should tell you. My clients have actually been waiting for me to do this for nearly a year...yes, I'm embarrassed to say it. But now I can. Because I'm done!

Yes!!

xo, dh :o)

A Peek into the Birdhouse

Miranda's room is far from done...but if I wait till then to share snippets of her cozy, dreamy little space it may be far too long of a wait! So...here are some photos, what I've been slowly designing, amassing, painting, collecting for the Bird's room. She seems to love her room, and we do too. It's inspiring me to not feel so restrained with the rest of the house. I mean, if we're stuck here for awhile (slumpy housing market) we may as well make the best of it right? And besides, it's an amazing house and we pinch ourselves that's it's ours (or at least maybe 7% ours?) :o)

Enjoy this (extra extra photo heavy) post!

Hello, I'm Miranda Bird. Welcome to my room :o)

Loving the Flor carpet (toy poodle square in lush lilac)

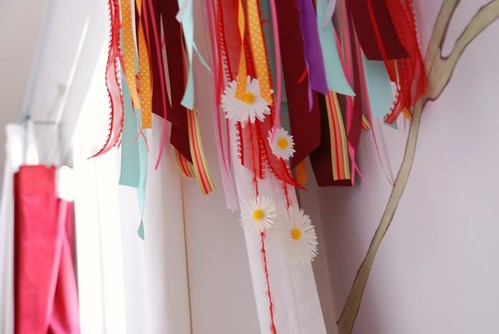
Ribbon mobile that has bounced around the room. Made up of red, burgundy, orange, and aqua ribbons with some Martha Stewart scrapbooking stickers for extra pop.

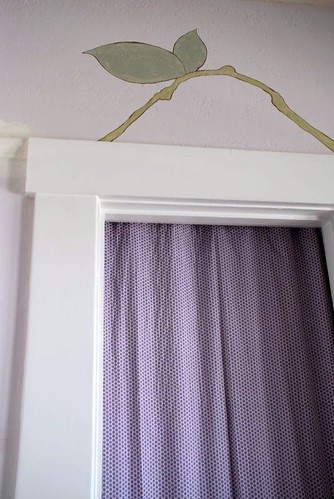
Miranda's closet is great - good sized, with plain shelves (I someday need to paint, or paper them), plus a rod we put in. But who wants to look at that? Or have a door cut into the room's footprint? I love hanging curtains for closet doors - this one I sewed from Aunt Grace reproduction fabric - purple polka dots on white...love it.

Another item I salvaged from my former office...lovely ikea floating shelf. These things are awesome. You see them used on so many design shows because they're just so fantastic. Love how you can't see the hardware, yet it's a deep shelf that can hold a lot of weight. This one I already had painted the grayish lavender of my office, and since I kept the wall color for M's room it got to stay and fit above the changing area built-ins. On the shelf is Mariposa the penguin (I made this before she was born, and had to save it for her, just couldn't let it go...), two vintage glittery lovebirds I got off Etsy, plus a great box from a friend.
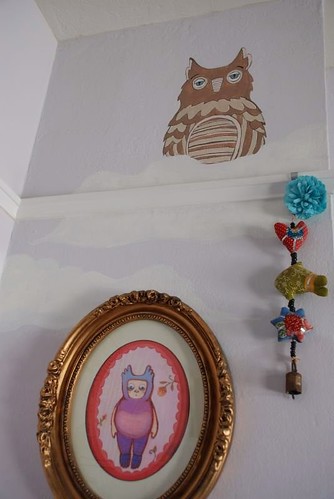
Over her crib...a watchful owl...just love owls of course, and painted one nestled in the clouds. Beneath that is a framed print of my "Owl" painting (prints are available in my shop if you're interested). Looks so great in that gilded frame. The plush/bell hanging next to it is from Panama, from my favorite store (an Indian store of all places) called Sol de la India. I always hit that place when I'm back there...tablecloths, baby pajamas (Chinese baby pajamas - even more random yes!), placemats and napkins, carvings and jewelry, etc., etc. - great for presents.
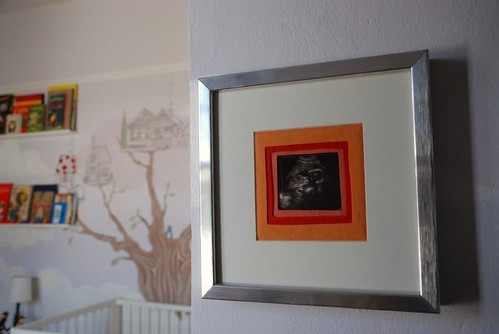
Miranda's ultrasound :o) Someday I'll either paint her name in there, or paper the white mat with something to tie it together (a great little feedsack print would be nice). No, I cannot leave well enough alone.

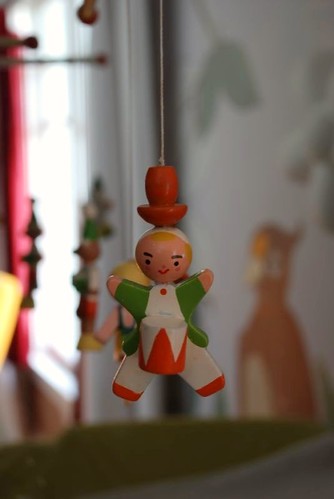
Vintage Irmi (made in the USA baby!) mobile that hangs over the changing pad. Got it for a steal off Etsy. I also found a great little Irmi table lamp with a kitten that you can wind up to play the tune - the kitten then spins, and a girl in a rocking chair rocks back and forth - cute, if a little out of tune. :o)

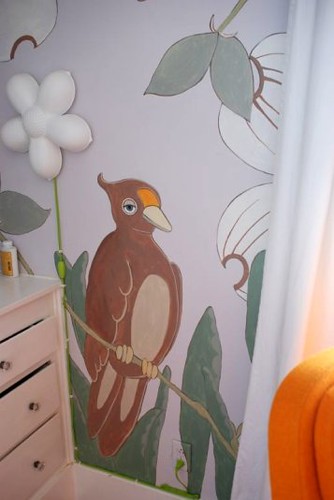
Hmm, that's a little blurry, be careful when editing photos in Flickr - wasn't blurry when I uploaded it. Anyway, here's a peek at a nearly finished area of the mural. I painted two oversize birds - here's one, plus a great ikea flower light (with green cord, love that!), and a glimpse at the humongous dogwood blossoms that float across the walls.

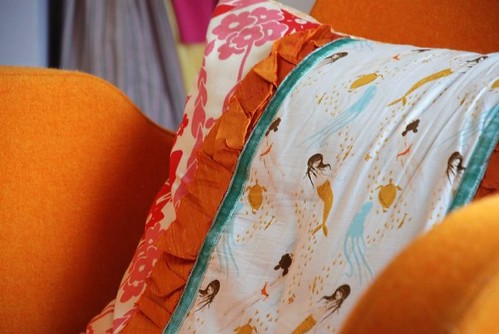
Cozy pillow in a cozy chair...we got this chair for a crazy good price in the "As Is" section at ikea. Got it cleaned by Naturell (natural upholstery cleaning) and boy is it comfy. It's a great chair for nursing, or just kicking back. The pillow is a combination of fabrics from Heather Ross, Anna Maria Horner, and Anna Griffin. Orange silk and super soft rayon velvet trims from Hart's Fabric finish it off.

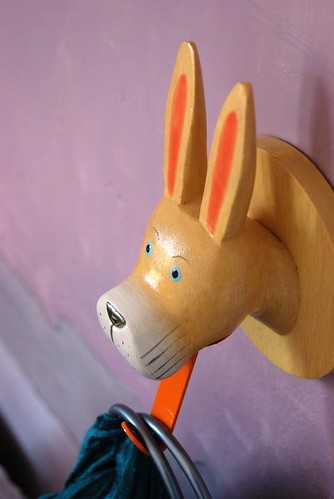
We wandered into Paper Source one day while enjoying an afternoon (pre-baby) at Santana Row. Lunch at Pizza Antica, browsing at Anthropologie...yes, lovely day it was. I picked up this rad hook - don't you love a bunny tongue to help hold your fabulous silk baby sling? I sure do :o)

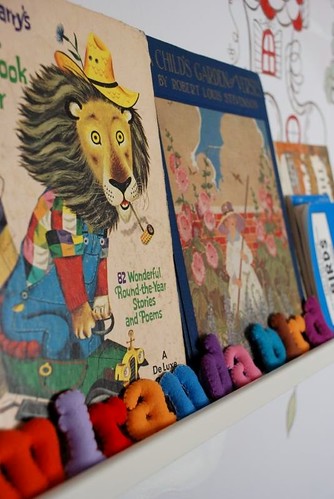
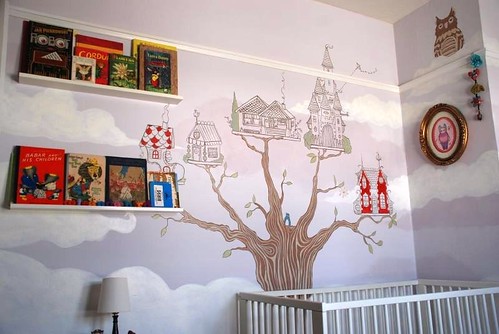
It kind of pains me to show you this one...it's just that it will be SO amazing when it's done that I wish I wasn't showing it off unfinished :o( But, maybe it'll help motivate me to get back into working on it soon. It's a tree full of "tree houses" of course - or maybe they're bird houses - open to interpretation. From the left: shoe house, tiny Swiss chalet, craftsman bungalow, dreamy castle, and quirky victorian. And below the tree sprouting from very fluffy clouds is Miranda's crib - very simple and modern, clean lines - nice for such a detailed room. Oh, and of course, check out those fabulous books! Many of them are from when my brother and I were little. A couple I picked up from Recycle Bookstore and are from the 1920's. It's a nice, growing collection that Mbird will be able to get her hands on as soon as she stops sampling everything by mouth :o)

Hope you enjoyed the mini-tour!
Thanks for coming along :o)

xo, devon

ps - I'm going with this for the studio bathroom:


With a piece of this to put in a frame:


mermaids! mermaids! mermaids!
Have a lovely Monday :o)

A trainscape of yonder year

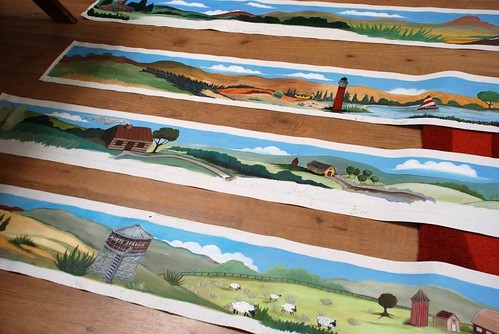
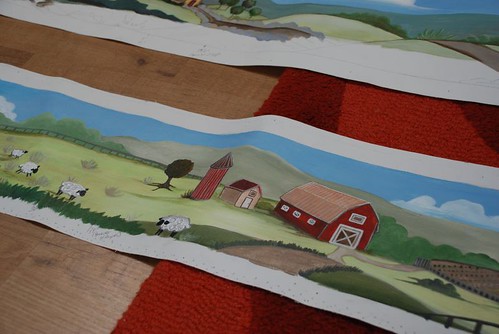
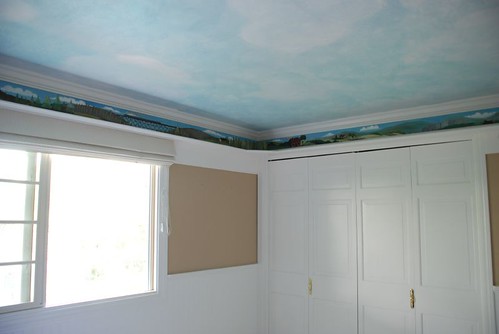
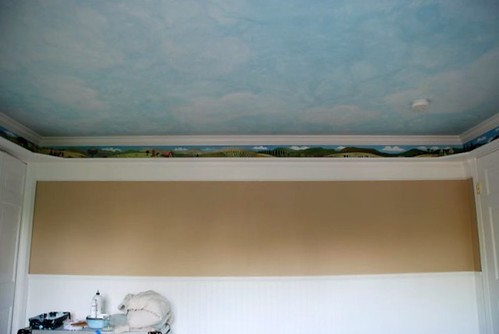
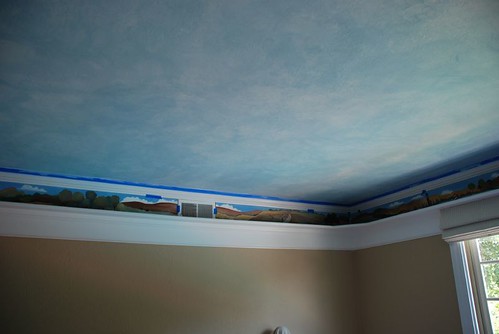
I just finished a really fun mural job that involved painting a landscape for an "O"scale model train (circa 1897) that will run around a track near the top of the wall. It's such a neat idea and the whole thing turned out so nicely. The landscape is filled with little houses, a barn, train station, dogs running in the hills, a lighthouse, etc...plus a soft hazy sky on the ceiling. I'll have better pics soon...new camera on its way!

Train station...waiting for arriving passengers.

fairies and castles and other lovely things

I just finished a really adorable mural for two wonderful little girls. It's too fun to come up with these designs and make little stories inside them - someday...I will put a book together with all the characters and scenery I love to paint!

One side is the fairy castle with fairies enjoying their past times - planting flowers and swinging from the trees. A bunny is hanging out in the shade. Hard to see in the pic, but the castle has lots of 'blingy' details :o) I used golden's gorgeous gold paint in the base coats and also full strength for the butterfly at the castle entrance.

The other side has a flock of butterflies led along by a majestic fairy on a flower chariot (from a really classic children's illustration - done in my colors and style). And a fairy picking flowers among the mushroom forest.


Next week I'm painting something really cool too - a scenery backdrop for a real scale model train. The train will run along its track all way around the room - up by the ceiling. I'll also paint a sky for the ceiling.